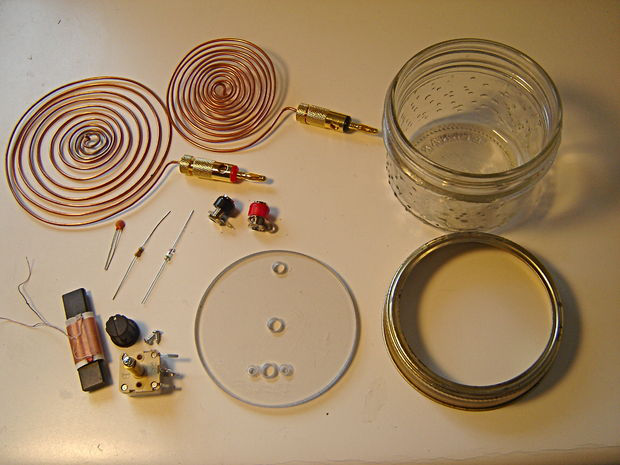
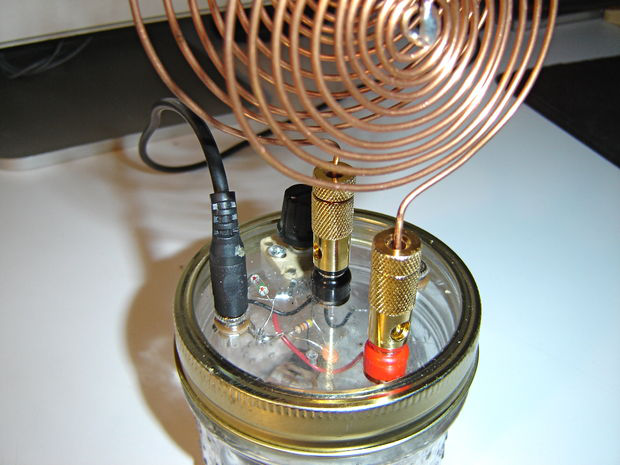
注:这部分侧重制作方法
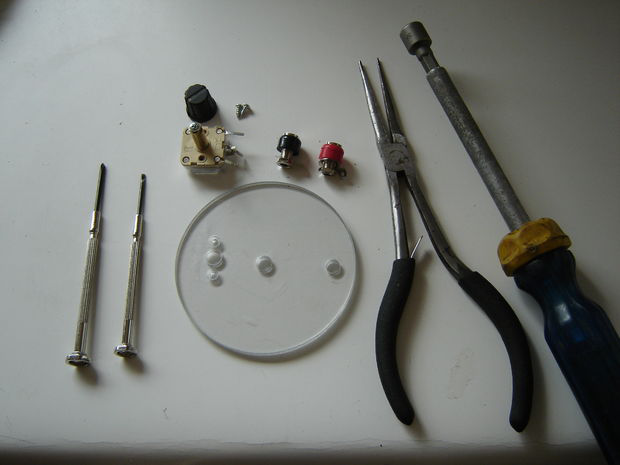
List of Materials
1- Small Jam Jar, (Mason Jar) with large mouth
小果酱瓶,(有金属螺旋盖的玻璃瓶),广口。
1- 3 1/4 inch dia Plexiglas (or polycarbonate) cover lid, 1/8 inch thick
3.25英尺直径有机玻璃覆盖板,1/8英尺厚
1- C1 – 60/160 pf Variable Capacitor (ComtrolAuto #VAR160-1)
C1-60-160PF可变电容(ComtrolAuto #VAR160-1)
1- Extension Shaft and Knob for above (ComtrolAuto #ExtKnob-1)
套管伸缩轴和旋钮,给上面提供的。
1- L1 – 680 uh Ferrite Loopstick Antenna (ComtrolAuto #LSA680-1)
L1 – 680uH铁氧体棒天线
1- D1 – Germanium 1N34A Diode (*Allied Stock#: 935-0301) $2.16 ea
D1- 锗1N34A二极管
1- C2 – .001uf Capacitor (marked 102) (*Allied Stock#: 507-0822) $.21 ea
C2 – 0.001uF电容(102)
1- R1 – 47k Resistor (*Allied Stock#: 296-6641) $.05 ea
R1 – 47K 电阻
1- Chassis Banana Jack Red – (*Allied Stock#: 528-0158) $.53 ea
带座香蕉插座-红
1- Chassis Banana Jack Black – (*Allied Stock#: 528-0159) $.53 ea
带座香蕉插座-黑
2 – (or more for each antenna) Banana Plug (*Allied Stock#: 528-0302) $1.21
(如果多的话,给每个天线都弄一个)香蕉头
2 -3.5 mm Mono Chassis Jack (*Allied Stock#: 932-0260) $1.16
3.5mm耳机座
a few inches of 20 gauge hook-up wire solder
几英尺20号 连接线焊锡
1- Audio Patch Cord, 1/8 inch plug ends
音频线,1/8英尺插头端
Total Cost less than $30.
总花费小于30美元
Note1: Most of the above crystal radio parts are available in kit #SC-Kit-1 from ComtrolAuto
注意1:上面的所有晶体无线电零件都可以从ComtrolAuto的#SC-Kit-1买到。
Note2:Complete crystal spirit radios that can be adapted are available from EJ Gold at YoyodyneIndustries.
注意2:全部的能获得的晶体精神无线电,都可从YoyodyneIndustries的EJ Gold获得。
Note3: For Each Spiral Pancake Antenna,
6 feet of #14 gauge solid copper wire
Banana Plug
注意3:对于每个螺旋盘型天线,6英尺14#的实心铜线,接香蕉头
Note4: For the Football Style Antenna,4 feet #10 gauge solid copper wire.
40 feet of #30 gauge coated magnet wire.
Heavy Paper
Scotch Tape
Hot Glue
SuperGlue
Banana Plug
注意4:对于足球样式的天线,4英尺10#规格实心铜线。
40英尺30#规格漆包磁线
硬纸
透明胶带
热熔胶
超强力胶水
香蕉插头
Tools
工具
Needlenose pliers
钳子
Wire Cutter
剪线器
Soldering iron
烙铁
Computer w/ Audio Hijack audio software (Mac), or equivalent
电脑音频头,音频软件(苹果),或者相当的
Crystal radio parts and kits available at http://comtrolauto.com/
晶体无线电零件和套件可以在http://comtrolauto.com/买
Step 2: Make a Clear Cover and Drill It
步骤2:做个盖子并且给它钻孔
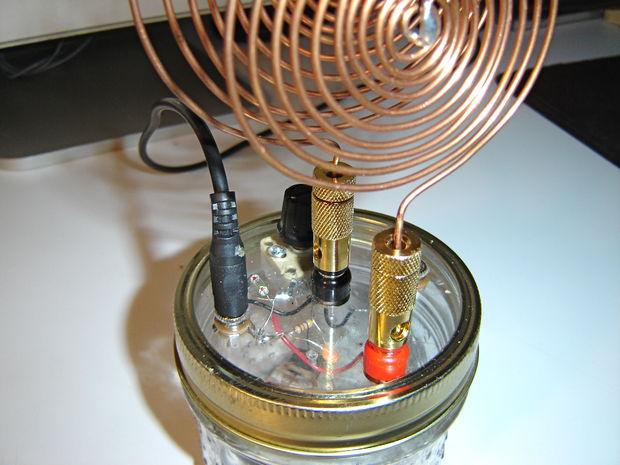
The first step is to create a clear lid so we can see the simple but effective radio components. I chose polycarbonate just because that is what I had on hand. Acrylic can be used, but it won’t machine as easily.
第一步是做个盖子,因此我们能看到简单的但是有效的无线电元件。我选择聚碳酸酯只是因为那是我手头有的。亚克力可以用,但是不好加工。
Use a circle cutting attachment on a drill press to cut out a 3.25 inch disc cover lid out of 1/8 inch Lexan polycarbonate.
用一个圆形切割附件,安在钻头上,压着切一个3.25英尺盘型盖子,从1/8英尺厚的聚碳酸酯材料。
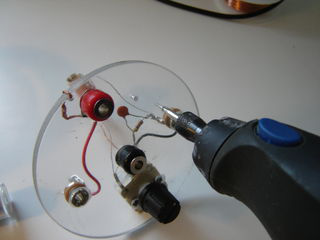
Next, 1/4 inch holes are drilled in the cover lid for the two banana jacks and for the two audio jacks.
下面,在覆盖板上要钻1/4英尺的孔给2个香蕉座,并且给音频座。
The two banana jacks will receive banana plugs with pre-mounted antennas.
这两个香蕉座将插入和天线安装在一起的香蕉头。
Two audio jacks will also be used. One is for for audio out to the computer, and one is for an optional auxiliary input modulation from a hand gripper or other source.
2个音频座也会用到。一个用来将音频输出到电脑,另一个为了可选的辅助的来自手握力练习器或其他源的调制。
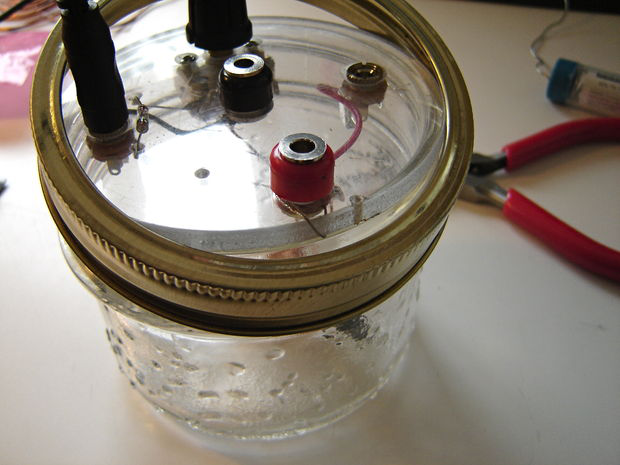
Drill holes as seen in the photos, or lay out your own hole design. I drilled a total of nine holes;
像照片里那样钻孔,或者布局你自己的孔设计。我钻了总共9个孔。
Two 1/4 inch holes for antenna banana jacks,
Two 1/4 inch holes for audio jacks,
2个1/4英尺孔给天线香蕉座
2个1/4英尺孔给音频座
One hole for the variable capacitor shaft, and two small 1/16th inch holes for its screws and two 1/16th inch holes to feed the diode wires to mount the diode on top of the jar lid (This is for better light-to-sound effects; as the 1N34A diode is light-sensitive)
一个孔给可变电容的轴,和2个小的1/16英尺的孔,给可变电容的固定螺钉,2个1/16英尺的孔给二极管的线作为二极管在广口瓶盖上面的底座(这个对光变声音效应,因为1N34A对光是敏感的)。
Step 3: Mount the Components on the Cover
步骤3:把元器件镶嵌到盖板上。
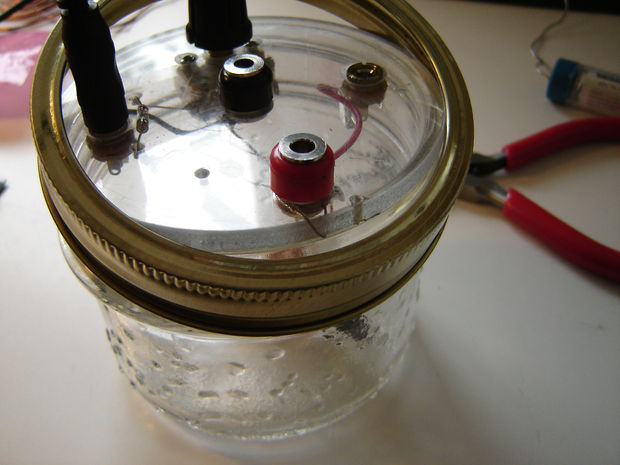
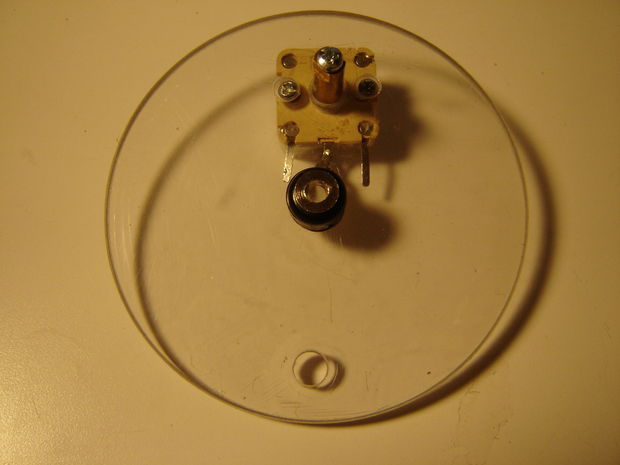
Mount the Adjustable Capacitor and Banana Jacks in the clear jam jar cover.
把可调电容和香蕉座放在果酱瓶盖子里。
For the variable capacitor, I had to find two screws long enough to feed through the 3/16 inch thick cover. A thinner cover will work with standard screws. The variable cap has an optional shaft extension and knob kit found at http://comtrolauto.com/
对可调电容来说,我不得不找到2个足够长的螺钉,使其穿过3/16英尺厚的盖板。如果用标准螺钉,一个薄的盖板是适用的。可变电容有个可选的延长轴和球形把手,能在http://comtrolauto.com/找到。
Mount the 1/8 phone jacks as well. I had to countersink the holes to get the threads to start because of the rather thick plastic cover I used.
也固定1/8的电话插孔。我不得不打埋头孔,使螺纹生效,因为我用了相当厚的塑料盖板
Step 4: Prepare the Induction Coil
步骤4:准备感应线圈
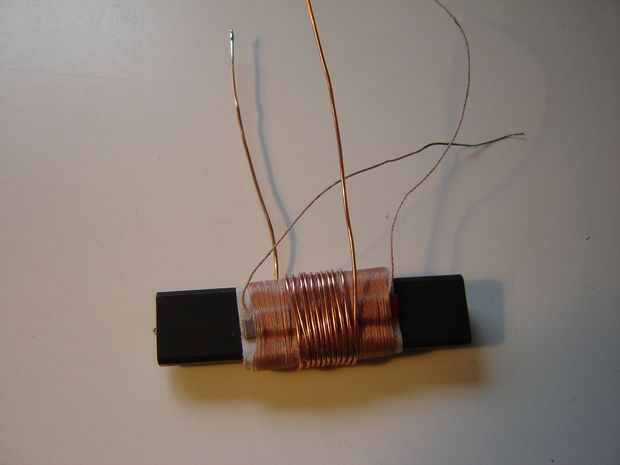
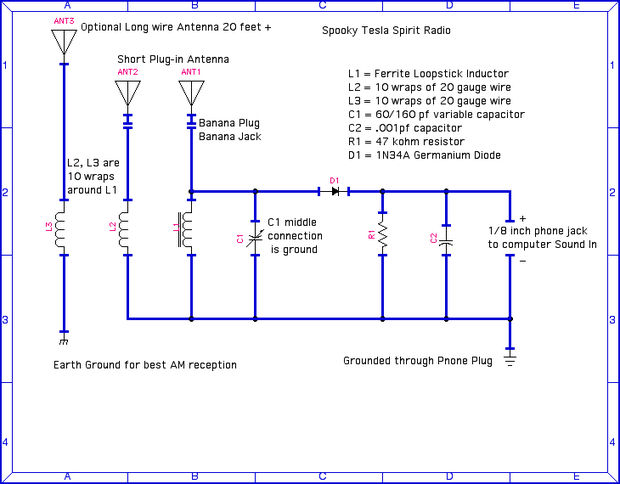
There is an option with the Induction coil to run it direct with an antenna connection, or to wrap the Induction Coil with about 10 wraps of 22 gauge wire that runs from the antenna to ground. The first method gives a better chance of a station signal being loud enough with a short antenna. The second wrapped inductor method is best for using a long (20 foot plus) antenna. See schematic for clarification.
对电感线圈来说有个选择,是把它直接和一个天线连接,或者在电感线圈周围绕10圈22号的线,让这条线从天线连接到地。第一个方法会提供一个更好的信号接收,用个短天线就能足够大声。第二种绕制电感的方法对使用一个长(20英尺)的天线是最好的。看图来说明。
I like the inductive method even with a short antenna, because it gives a clearer signal with less 60 cycle hum. The amplitude of sound will be less in AM tuning unless a long antenna is used however. The amplitude can be partially made up by using the human body as an antenna by touching the jam jar ring, which has a connecting wire that goes to the antenna + wire when the lid is twisted on.
我更喜欢用一个短的天线那种方法,因为它能提供比较少的60周期噪声的清晰信号。在AM解调的时候,声音的幅度可能会少点,除非用一个长天线。可以通过用人的身体作为一个天线,通过触摸果酱瓶的环来使幅度部分提高,这个环有一个直通天线+线的连接线,当盖子盖上的时候。
The other advantage of wrapping the inductor is that it gets supported inside the jar by the heavier wires.
绕电感的另一个优势是,它能够使用粗线还能被罐子装下。
Step 5: Wiring and Soldering
步骤5:布线和焊接
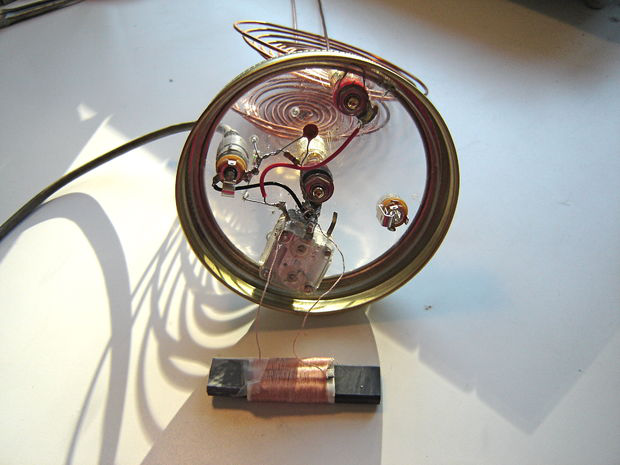
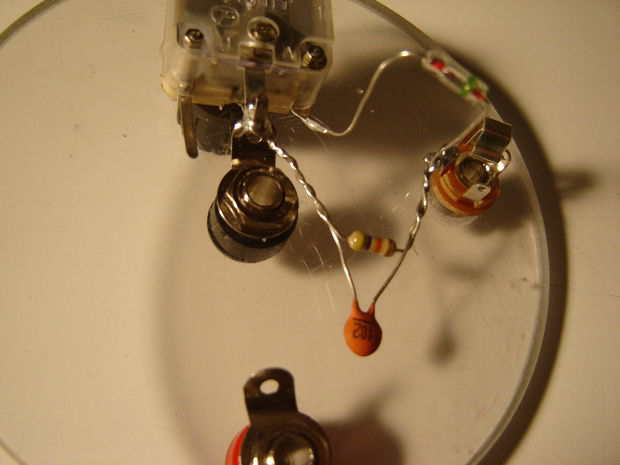
Ok, once most components are in place, it’s time to wire and solder things up. Direct point-to-point wiring can be used with so few components. Follow the pictures and the schematic for the basic connections.
好的,一旦大多数的元器件就位了,就该布线和把它们焊接上了。直接点对点的线几乎用不了多少元件。按照图片和原理图,先基本连接好。
Only a couple of wires need to be soldered in. Run one ground wire from the middle ground post of C1 to the ground connection on the phone jack. Another wire will go from the antenna to the other C1 post.
只有几条线需要被焊接上。从C1中间的地引一根线到听筒塞孔的地线连接上。另外一根是链接天线和C1的另一脚的。
Note that the centre connection of the C1 variable capacitor is connected to the ground connection of the phone jack. The 160 pf connection is on the right facing C1 from the top looking down, connecting tabs facing away from you. The 60 pf connection is on the other side of the middle ground connection, and was not used.
注意,可变电容C1的中间连接处被连接到听筒塞孔的地线连接处。160pF的位置是从上往下看的最右端,连接标签的面远离你。60pF的连接处是在中心接地点的另外一面,没有用。
The D1 diode is heat sensitive and may fail if over-soldered. Use an alligator clip as a heat sink when soldering its leads. I mounted it on top of the cover to make it more sensitive to light.
二极管D1对热是很敏感的,如果过度焊接可能会损坏。当焊接的时候,拿一个鳄鱼夹来给它导热。我把它安装在盖子的上面来使其对光敏感。
The L1 Induction Coil thin wire with black paint goes to ground. The other thin inductor wire goes to the non-ground C1 capacitor connection. L2 is simply 10 wraps of wire around the inductor coil.
L1电感线圈,黑漆包线去接地。另一边的细电感线连接到没有接地的C1电容的引脚。L2就是简单地在电感线圈上绕10圈就行。
Step 6: Make the Tesla Spiral Antennas
步骤6:制作特斯拉螺旋天线
“The Tesla antenna is a form of wireless antenna or wave launching structure developed by Nikola Tesla in which the transmitted energy propagates or is carried to the receiver by a combination of electrical current flowing through the earth, electrostatic induction and electrical conduction through plasma with an embedded magnetic field.”
– Gary L Peterson in “Rediscovering The Zenneck Surface Wave”
“特斯拉天线是由特斯拉开发的一种无线天线或者波的发射结构,用这个天线传输的能量传播或者被运载到接收端,通过 流过地球的电流,静电感应和由通过嵌入磁场的等离子体产生的导电性 这些的组合。
This is an area for scientific and artistic license. There is still much debate as to what exactly Tesla was up to with his transmission and reception of power systems. ( See Joel Young’s blog comments in Design News Magazine on July 8th, 16th and 28th…
这是科技和艺术融合的领域。关于特斯拉的能量系统的发射和接收,仍旧有很多争论。(看7月8好,第16期和18期的设计新闻杂志里,Joel Young的博客)
http://www.designnews.com/blog/The_Weird_and_Wonderful_World_of_Wireless/index.php?text=tesla+antenna+
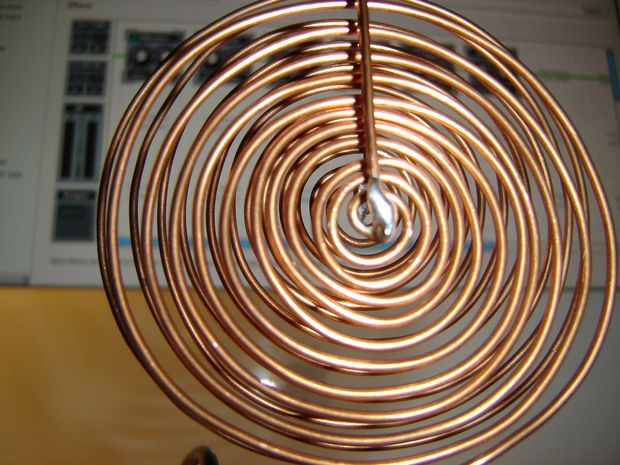
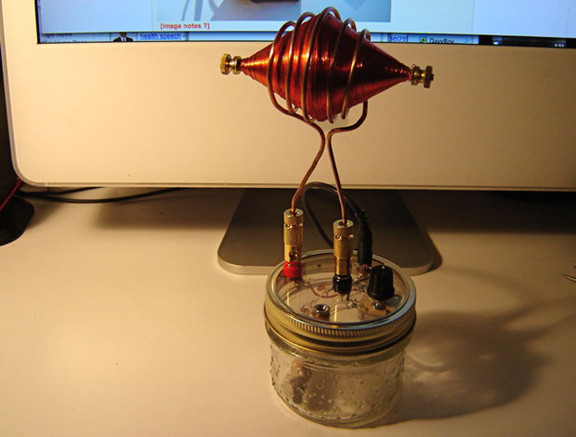
I experimented with two types of Tesla antenna design. The first is similar to the flat spiral “Pancake” coil that is seen in several of Tesla’s patents. The second is a peculiar “Football” coil made of two cones.
我实验了2种类型的特斯拉天线设计。第一种和平的盘型螺旋线圈相似,就像他专利里看到的那样。第二种是一种古怪的“足球样式”的由2个锥形组成的线圈。
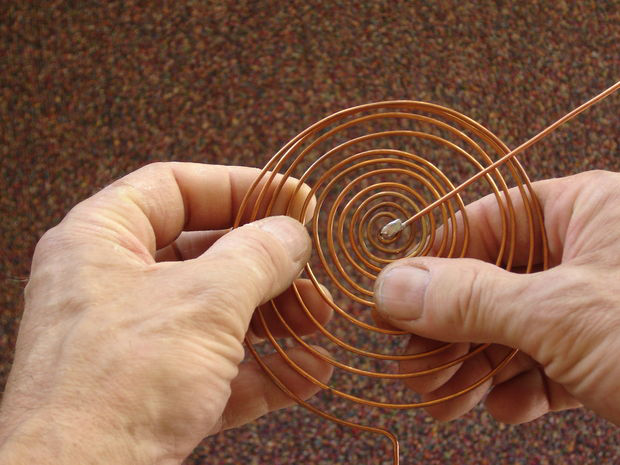
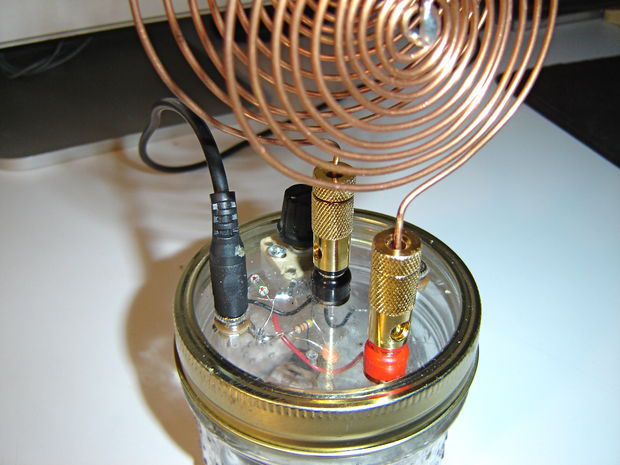
For the basic spiral antenna, I used a 6 foot length of 14 gauge solid copper wire, and bent the wires by hand, coil by coil. I used a needle nose pliers to begin the core spiral, and after a turn or two, gently but firmly worked the wire around with bare hands. I soldered on a short vertical antenna to the centre loop. In retrospect, It would have been better to make the vertical end part with a one piece construction.
对于基本螺旋天线来说,我用了6英尺长的14号实心铜线,用手弯曲这些线,一圈一圈挨着。我用了一个针头钳来扭曲螺旋中心,在1圈到2圈后,轻轻地但是稳固地用手接着弯曲。我焊了一个和中心圈垂直的短天线。回顾一下,如果使垂直的末尾部分用一个单片结构,可能会更好的。
Keep working the wire to eliminate kinks and bends, then make sure the coils are evenly spaced. I soldered on the vertical antenna last.
继续绕线以消除扭结和弯曲,然后确保线圈间隔均匀。最后我在垂直天线上焊接。
Step 7: Make a Peculiar Tesla Football Antenna
步骤7:制作一个古怪的特斯拉足球天线
This coil was one of Tesla’s later designs, and is said to have spooky anti-gravity effects when pumped with the correct frequencies and voltages. I won’t be working in that high-power range with this un-powered crystal radio !
这个线圈是特斯拉晚些时候的设计之一,据说具有幽灵般的反重力效应,当灌输正确的频率和电压的时候。对这个无源晶体收音机来说,我不会在高功率范围内使其工作。
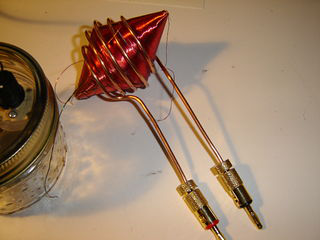
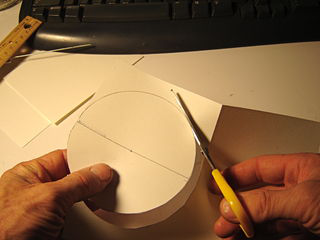
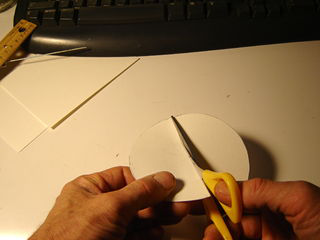
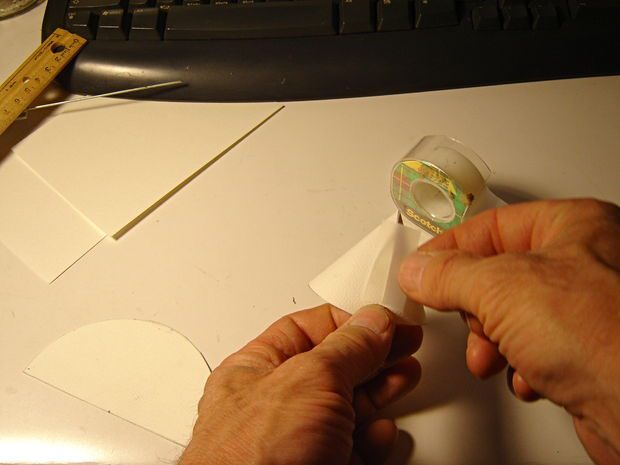
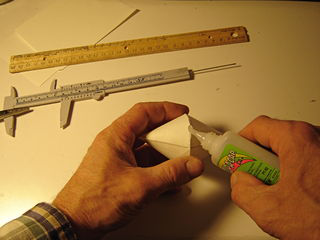
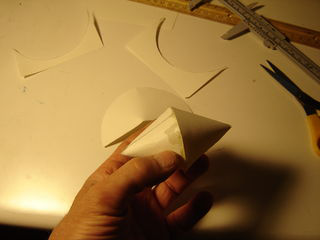
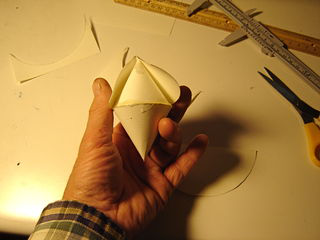
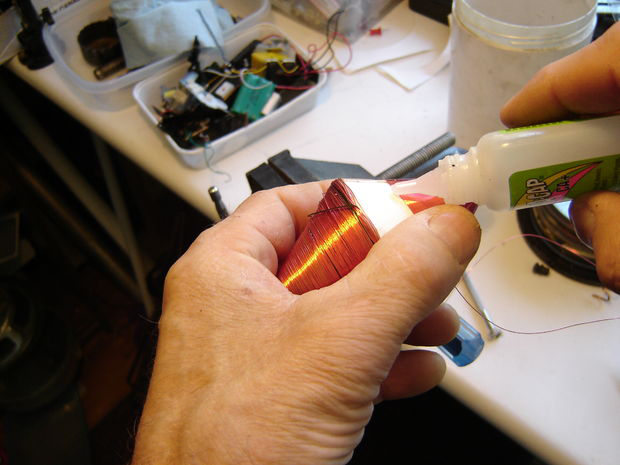
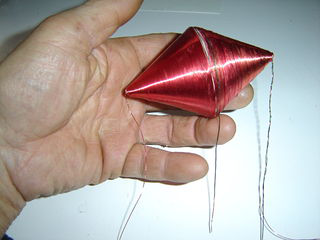
The core of the Tesla Football Antenna is made with four 2 inch paper cones glued and taped together. The paper cones were doubled up, two on each side, for strength and smoothness.
特斯拉足球天线的核心用了4个2英尺的纸锥形,并且胶合到了一起。纸锥形是重叠的,每一边2个,让它更结实和平滑。
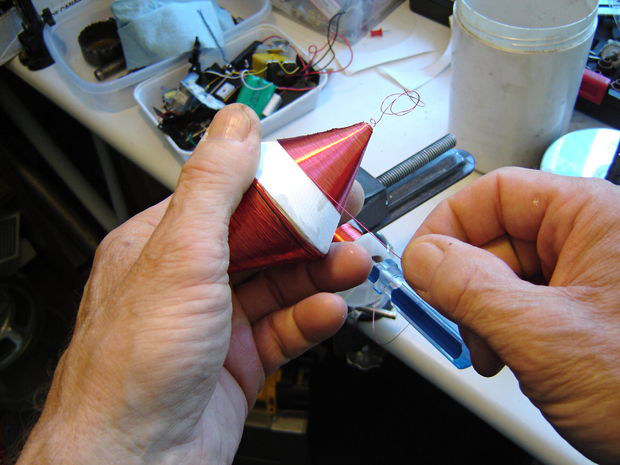
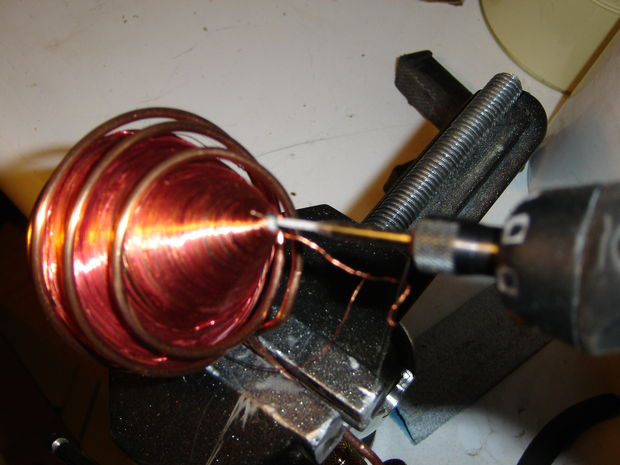
The 30 gauge wire conical coils are wound laboriously by hand. The thick 10 gage copper wire was carefully bent to conform to the football coil without disturbing the coils of the coil. (Note to self…don’t try this again without coating the wires with a resin or glue first, because the coils will start unravelling…)
30号线锥形线圈是手工费力绕的。粗的10号铜线小心地被弯曲在不破坏线圈的线的情况下,来适应足球线圈。(注意。。。在没有用胶水把线圈粘牢时不要再次这样尝试,因为线圈会散开的)
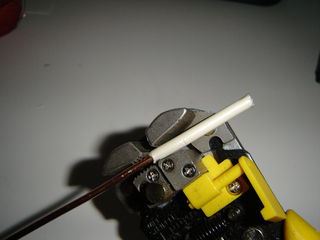
After this small coil-winding feat, two snazzy Banana Plug ends are put on. These ones were found at an electronics store.
在这个小绕线圈手工活后,2个好看的香蕉头装上。这些都是在电子市场找到的。
Here’s a link to a similar coil that puts out sparks!
下面是一个能产生火花的相似线圈!
[http://www.tesla-coil-builder.com/double_cone_bipolar_tesla_coil.htm]
Step 8: Testing the AM Radio Circuit
步骤8:测试AM收音机电路
This step is a circuit test of the Tesla Spirit Radio, to see if it works as an ordinary AM radio. Once the wiring and solder connections are double checked, we can test the AM radio part of the device.
这一步是特斯拉精神收音机的电路测试,来看看它是否能像个普通AM收音机那样工作。一旦布线和焊接连接好好检查过后,我们就可以测试设备的AM收音机部分了。
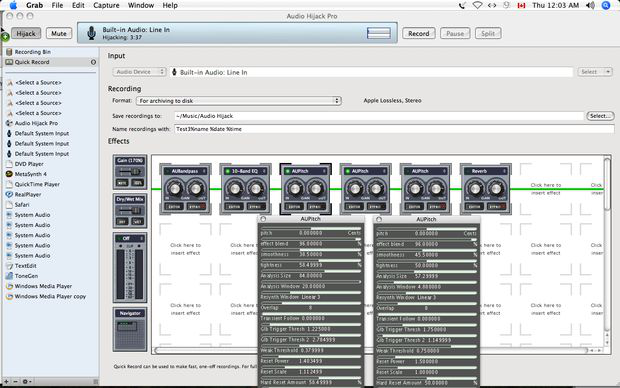
Plug in the Audio Patch Cord into the 1/8 inch jack of the radio, and then into the computer “Sound In” port. Launch Audio Hijack (or equivalent PC software). Set up with a basic 10-Band EQ and two or three AU Pitch controls. AU Bandpass and Reverb won’t be used for this test…use their “Bypass” buttons. Gain may need to be turned up high. Au Pitch controls at the neutral 0 pitch setting. (See screenshot below.)
把音频线插到收音机的1/8英尺座,然后另一端插入到电脑的“音频输入”口。
启动音频附件或等效的PC软件)。设置一个基本的10波段EQ,和2-3个AU强度控制。AU带通和反响在这个测试里不用。。。用它们的“旁路”按钮。增益可能要调高一点。AU强度控制设置到0.(看下面的屏幕截图)。
Turn the variable capacitor knob and the sounds of a local AM station should come through; if not, a long antenna may be required in your area. Try touching the jar ring or antenna to see if that makes a difference.
旋转可变电容的旋钮,一个本地的AM电台的声音应该会来到;如果没有,一个长点的天线,在你的区域可能要用到。试着触摸这些环或者天线来观察是否会有不同的现象。
If you have no sound at all, then something is likely wrong. Check for a dry solder connection. Also, if too much soldering heat was used close to or on the diode connection, the diode may be burned out. Substitute to check, or use the diode checker function of your multi-meter to test it if necessary.
如果根本没有声音,那么可能是哪错了。检查是否虚焊。如果在二极管附近或者焊接二极管的时候,焊接时候很热,那二极管可能会烧掉。取而代之,或者有必要的话,用万用表的二极管检测功能测试 。


